Getting Started with Quarky
Welcome to the StemSpace ecosystem! This guide walks you through unboxing your kit, charging the onboard lithium battery, installing the desktop or tablet software, and executing your very first LED blink program.
Quick Start Checklist:
- Connect Quarky to your computer using the included USB-C cable.
- Turn on the power switch located on the left side of the controller.
- Launch the StemSpace application and select Connect → Bluetooth / Serial.
- Drag a
When Quarky Startsblock and snap aShow Emotion: Smileblock underneath.
Hardware Pinout & Expansion Ports
Quarky features 12 digital/analog I/O pins, 2 dedicated high-current DC motor terminals, 4 servo header sockets, and an I2C communication bus.
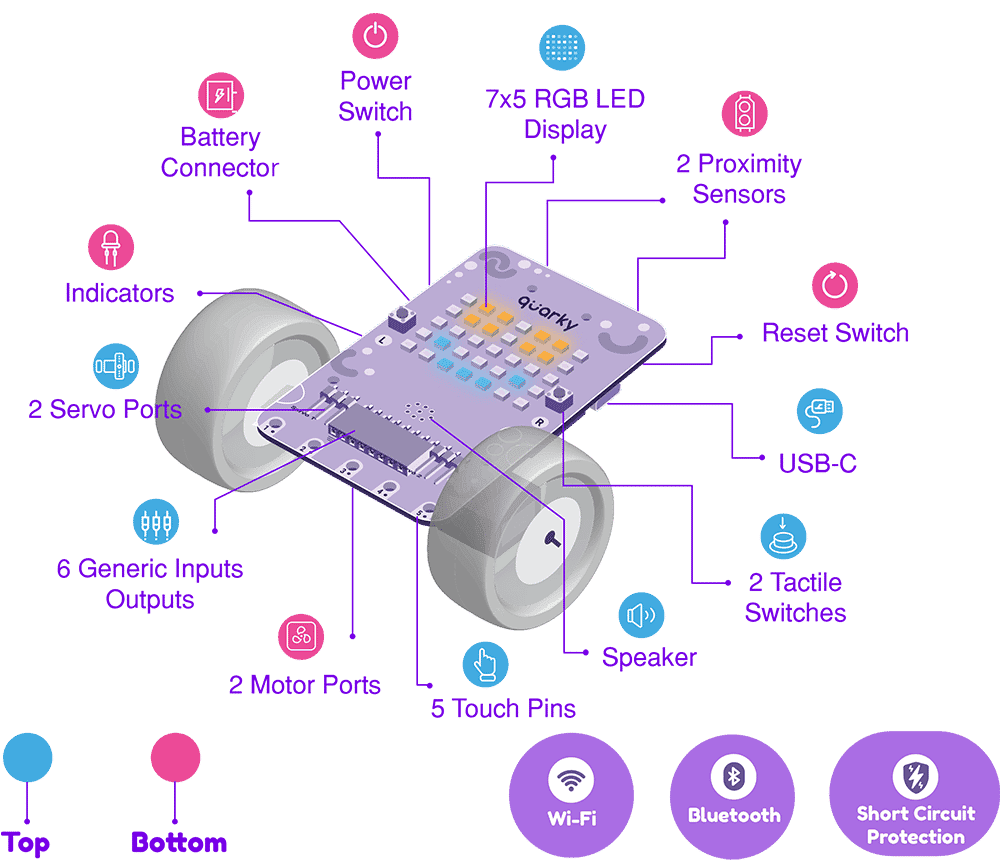
| Pin / Port | Type | Default Functionality |
|---|---|---|
| M1+, M1- | H-Bridge Motor Driver | Left Drive Motor (Speed PWM 0–100%) |
| M2+, M2- | H-Bridge Motor Driver | Right Drive Motor (Speed PWM 0–100%) |
| S1 – S4 | 3-Pin PWM Headers | Articulated Servo Actuators (0°–180°) |
| T1 – T5 | Capacitive Touch | Conductive Touch Pads (Front Panel) |
| I2C Bus | SCL / SDA | AI Vision Sensor / OLED Display Expansion |
Python 3 SDK Quick Reference
Program Quarky natively using our lightweight Python module. Below is a minimal script for obstacle avoidance using the ultrasonic sensor.
from stemspace import Quarky
import time

bot = Quarky()
bot.display.show_emotion("smile")

while True:
    distance = bot.sensors.get_ultrasonic_distance()
    if distance < 15:
        bot.display.show_emotion("surprised")
        bot.motors.stop()
        bot.speaker.play_beep(frequency=800, duration=0.2)
        bot.motors.turn_left(speed=60)
        time.sleep(0.5)
    else:
        bot.display.show_emotion("happy")
        bot.motors.forward(speed=80)
time.sleep(0.05)Software & Driver Downloads
Get the latest version of StemSpace IDE, USB serial drivers, and offline lesson workbooks.